I seem to be on a roll with the sewing lately.
I made this for the BigMiss over the weekend:
Well, actually just the skirt and leggings as I'd made the tee a week or so ago. (I think the tee makes the outfit look a bit busy - I didn't intend for it to be an 'oufit', she just put it on anyway.)
Pattern details:
Tee - Ottobre 3/2010 'Funky Sisters' design 31
Skirt - Ottobre 1/2011 'Indigo' design 18
Leggings - Ottobre 1/2011 'Cinnamon' design 17

Take one "unisex" (meaning: boy style) t-shirt:
Attack with an un-picker:
Add one "Funky Sisters" Ottobre* t-shirt pattern:
Mix it all together with a sewing machine:
I had to put the tag back in!
And you now have one very happy little girl!
The tee was a birthday present from J for BigMiss (from way back in June!) and it really was unflattering and big. She liked the idea of it, but didn't really like it so it got put in the drawer and forgotten about.
With the rearrangement of the bedrooms (when the carpet was finally in) there was also a rearrangement of the drawers and I found this tee back. J had originally said that I could 'just take it in at the sides', but this tee pattern was a better idea as I'd made it before and knew it looked good on BigMiss.
I'm very happy with the result and BigMiss has worn it every day after school, claiming it's her favourite t-shirt now!
*This is from issue 3/2010, pattern #31
Once J said to me, as he saw me from behind doing dishes, "You look like you've got Duck's Disease."
"What's Duck's Disease?"
"It's when your legs are too short for your body so your bum's too close to the ground."
Not much of a fair comment coming from him as he's around 6'4" anyway, though sometimes I do tend to agree with him.
Like any time I buy a new pair of jeans. They're all made about 2" too long for me.
I always have to take up the hems. But I hate when people can tell you did (or worse, you make them too short). So I take ages making sure they're the perfect length and look just like shop-bought whenever I do.
It's a job that often gets put off and I usually go around like this:
Yep, rolled up hems instead.
Which looks worse than a badly sewn hem (it's like wearing a sign saying 'I'm short').
So, with my latest pair of jeans I would'nt let myself wear them until I'd shortened the hems. Almost three weeks after buying them I got an unexpected afternoon off work (computer died) and decided that was the day I'd do my jeans!
The perfect length - just touching the ground when not in shoes...
and not touching the ground when wearing shoes.
The only problem is that now we're into Spring and the sun is rather warm on black jeans so I'm thinking a pair of light-coloured jeans would be a better idea!
What sort of necessary alterations do you have to make when buying clothes?
Joining in with other creative types over
here.
It's amazing how easily life gets busy and next thing you know it's five weeks into the school term and we're half way out to the next school holidays!
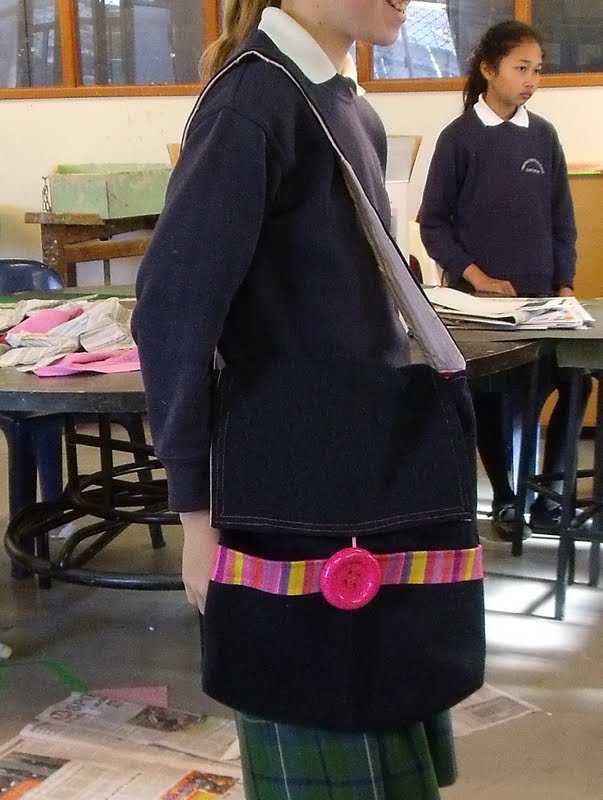
Friday just gone was my last sewing lesson for this term. Maybe you remember the bag I talked about making with the girls in class? It was a fantastic pattern to use with them and there was great satisfaction in having a cool bag they'd made themselves. Thanks, Meg! (The pattern was kindly donated to me by Meg McElwee of Sew Liberated for use in class. Make sure you ckeck out her website for more great patterns!)
This is my bag in it's current everyday-use state (you might notice I changed it a bit from when I first made it - I swapped the front and back around and shortened the body so it wasn't as deep.)
I decided to give the girls a bit of a challenge (and save the parents money on fabric) and told them to find old clothing and sheets to use for the bag. I wanted to encourage the idea of re-using materials for projects.
This bag was made from an old denim skirt (dark fabric), a pair of jeans (light fabric), and two shirts (red and patterned fabrics). We used the back of the skirt as the back outer panel of the bag, leaving the patch pockets as they were so she has two funky pockets on the outside!
This bag was made from an old denim skirt and a couple of shirts. The button sewing was an extra skill they got to learn. For some of the girls, when I had them last time it was the first time they'd ever sewn before!
I could see that some of the girls would finish with time to spare so had asked them to bring along some extra fabric to whip up a quick and simple bag using the basic concepts they'd learnt with the first bag. It was encouraging to see how much they'd taken in and that I only needed to point them in the right direction or ask "What do you think you do next?"
Looking forward to next term when I get to do it all again with the other four girls in the class! (I only have half the class at a time while the other half does cooking and they get the option of sewing or woodwork so I didn't have any boys!)
I don't have any photos of the other two girls' bags - one finished the week previous and the other hadn't finished by the end of the lesson as she'd had two lessons off sick.
Check out the other creative folk over here.
I seem to have quite a collection of circular needles in a combination of interchangeables and fixeds. And I never seem to be able to find them when I need them! So I decided that I would have to make myself a case to keep them in order.
Ages ago I had seen someone selling interchangeable needle cases on
Felt and then heard that she was developing a pattern tutorial for sale. I eagerly awaited for the pattern to go up and bought one. I went out and bought my supplies (spent a dangerous amount of time in the local Quilt shop) and cut the pieces out, ready for sewing it together.
But while I was making it, I couldn't help but think how big it was. I had wanted something compact, similar to a cheque-book sized purse that would fit nicely in my knitting bag. Instead it turned out slightly bigger than my A5 notebook. It's a fantastic design and has room for lots of stuff, complete with plastic pockets to keep the needle tips from falling out while still being able to see what's there.
![]()
I was a little disappointed as the pattern never says on it what the final size of the case will be. And it doesn't come with pattern pieces, just dimensions to cut pieces out to without actually telling you what the pieces are for until you've put it all together (which by then is too late as I found out). Normally, I adjust patterns as I go to suit exactly what I want, which I would've done in this case if there were pattern pieces showing how big the final product was. So, I sat down and drew out a full size pattern of a new case in the size I wanted it to be and ended up with a completely different needle case.
This got me thinking, would anyone else be interested in a more compact sized interchangeable needle case for their knitting supplies? The one I've designed is approx 4.5"x9", can fit up to 14 pairs of tips, lots of cables as well as fixed circulars and has two zipped pockets (plus an optional third). I have the pattern drawn out to size on disc, it's a relatively simple construction and super easy to do up a pdf pattern for it. All I have to do is take photos of the process to demonstrate and I can have it available for testing. Is it worth doing, anyone interested?
Don't forget to check out all the other fantastic Creative Types over here!
Do you know what the best thing is about the sewing class I teach at school?
Planning what to make!
I've taught two terms now, and as I only take half the class each term (the other half does cooking), I've been able to do the same project (a skirt) both terms. But I have the first group of girls back again next term so had to plan something different to make.
The front - minus the button
It had to be something simple, but not too easy that it would be finished before our time was up. And I really like the idea of something useful and fun (hence why we did a skirt last time). I decided a bag would be perfect.
The Back
I had several ideas and went trawling the internet to find suitable patterns. But I kept coming back to one particular bag that I had stumbled across ages ago and always liked. It was the
Mischievous Gnome Messenger Bag by Meg McElwee of
Sew Liberated.
See the fancy internal pockets? Zip pocket on one side and patch pocket, with compartments for a pencil or two on the other
Now, I thought it was bad manners to just purchase a pattern and use it in a sewing class without asking permission from the designer first so I emailed Meg, telling her about what I was planning on doing with the pattern. And she emailed back with the amazingly generous offer to send me a pattern for free to use in my class! (This was not a downloadable pattern - it was a printed pattern she had to post international that she was giving me for free!)
Close-up of the bug 'patch' detail (excuse the flash!)
So the pattern arrived very quickly and I started planning what I was going to make my 'prototype' out of (to show the girls what we were working towards). J had commented that my
current knitting bag was rather 'Nana-ish' and I should really have a nice plain black one. I always have denim in stash so that was decided for the outer fabric. But I do like to take advantage of the funky prints available so spent some more time on the internet trying to decide what I liked best.
I had stumbled upon a fantastic Aussie designer,
Saffron Craig, via a
fellow blogger and she just happened to be having free shipping on all fabric purchases in May. So I ordered my fabric and waited for it to arrive!
The package arrived nice and quickly and I got the pattern pieces cut out and ready to sew. And then, finally, last week I got a chance to sit behind my machine and put it all together.
I made the bag as per the pattern with only a few modifications. I only made one outside pocket panel (the pattern has one on the front and the back). I used fusible fleece to back the lining with to make a softer inside. I added an extra internal pocket with a spot to put a pencil or pen. I made a button loop instead of the 'wrap around the button' ribbon (though I am yet to put a button on!)
Check back next term to see how it all goes in class!
May is my birthday month so I'm having a few giveaways to celebrate!
Today's giveaway is being hosted by Sew, Mama, Sew!
If you're here for the first time, you probably want to know a little about me and my blog.
I'm a busy mother of three girls, living 'downunder' in New Zealand. I design knitting patterns for children's clothing, constructed seamlessly from the top down (my patterns can be found here). I also love to sew, mostly clothes for my girls, and currently teach basic sewing skills to a group of 10-12year olds once a week at the small school my girls attend. This blog is a way for me to showcase all the crafting and creating I get up to.
But what you really want to know is: What is my prize for Giveaway Day?
Last year I made myself a knitting work-in-progress (wip) bag that is used constantly.
My wip knitting bag
I loved the pattern from the first time I saw it on the
U-Handbag blog and since making this one I've wanted to make another one just for the fun of it. I decided that it would be a perfect bag to have as the prize for my giveaway!
I thought it might be a bit too big and bulky to post so I shrunk the pattern to approx 3/4 size and left out the fleece padding to make a cute compact handbag.
The bag measures approx 24cm wide x 20cm high (approx 9.5" x 8") and the handles are about 18cm (approx 8").
I've put in a handy little internal pocket (approx 7cm/3" x 12cm/5") and the bag closes with a single metal snap. I can't remember the name of the fabrics used as it was a stash-busting project, but the main fabric is light pink with swirls and the lining is a lavender mini floral.
The bag is fully interfaced, including the handles, which is a bit stiff when new, but softens up nicely with use.
Now, how do you enter?
It's really easy. All you have to do is leave a comment below telling me what it is that keeps you interested in a blog and makes you want to comment on a post?
I will draw the winner on Friday evening (27 May) so you have until then to enter. Only one comment/entry per person and there are no extra entries for facebooking, twittering, etc but you are welcome to anyway!
This giveaway is open to anyone, anywhere that I can post to.
PLEASE include a way for me to contact you in your comment or your entry will not be valid.
PS. I will be celebrating my 100th post very soon with another giveaway, so make sure you become a follower so you don't miss out on hearing about it! Also, scroll down (or click here) for a chance to win a hand-knitted shawl in my Birthday Giveaway!
LittleMiss was desperate for new pants. She only had one pair that were not ripped at the knee or too short and they were just trackpants so not very suitable for wearing out.
So I sat down with the pattern books and sewing machine and made her a cosy pair of new pants.
I used chocolate brown baby cord which is just perfect for heading into winter with. They are made using a pattern from the Spring 1/2011 Ottobre magazine #13 called 'Plum'. (The exact same pattern is used for the boys pants #29 called 'No Kung Fu' but dressed up with the knee patches, so I decided to put knee patches on these too - hopefully they won't wear out as fast as usual!)
Never one to make plain things, I had to dress them up with contrasting fabric on the pockets and knee pads. I used some green gingham, printed with little green daisies that I had in stash. I love the way the back pockets are made into the yoke of the pants. I've accented it by using the green gingham as the pocket lining.
She especially loves the ties on the cargo pockets. I was planning on just putting snaps on them, but she saw the picture and said "The ribbons are what I like best" so I had to do them!
My only problem with them is that I made them just the right size, so she'll probably outgrow them this season. That's if she doesn't wear them out first - she hasn't taken them off since I made them, except for school (uniform). So next time I'll be making the next size up!
Make sure you scroll down to the previous post to enter my
Birthday Giveaway. And check back on Monday to see the
Sew, Mama, Sew! Giveaway Day prize I've got up for grabs!
(And just a small secret, I'm coming up to 100 posts very soon so was planning yet another giveaway to celebrate that too!)
J was away motorbiking in Norsewood on Saturday so just us girls were home. I asked BigMiss what she wanted to do and she promptly replied 'Sewing'. She's been asking me for ages if she can make a toy or some clothes for her doll or other stuff like that and I'd always put it off as it was never a convenient time to teach her. But Saturday was.
I remembered about a donkey pattern I'd saved from Ottobre ages ago and thought it would be something easy to make by handsewing (I'm not ready to let her loose on my machine just yet). So we printed it off and she cut out the pattern. I had to cut out the fabric as that was a little fiddly for her. I threaded the needle, showed her how to do it and let her loose! There were tears and tantrums and a need for time out from it at one stage but she managed to sew the ears and two legs. (Sorry, no photos of her working as the only one's I've got have her with tears on her cheeks.)
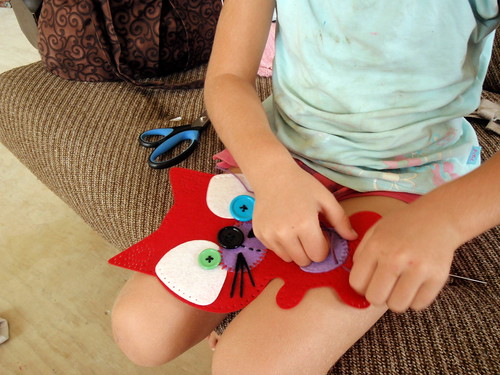
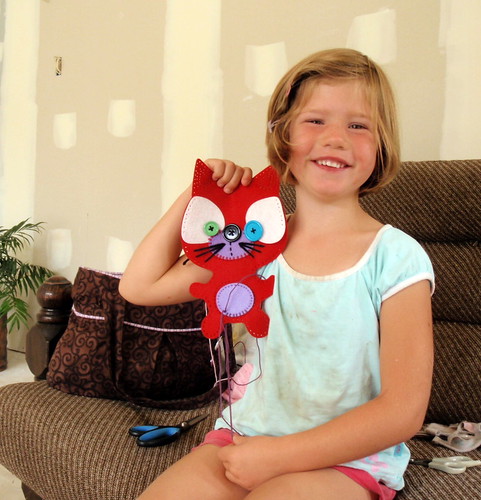
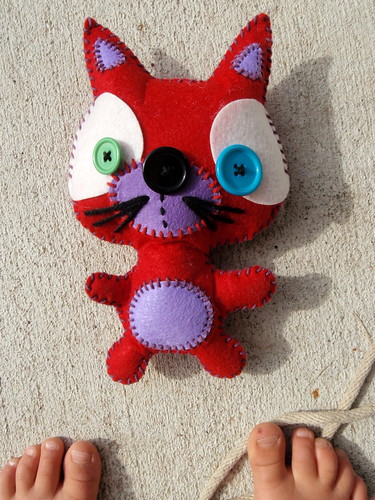
Of course the other two were not to be left out. MiddleMiss picked up her cross-stitch that she'd started sometime last year (and hadn't looked at since) and LittleMiss decided to make the kitten sewing kit she was given for her birthday.
It had pre-punched holes which made the sewing up very easy for her. She stitched all the features on the body (except the buttons as those holes weren't pre-punched).
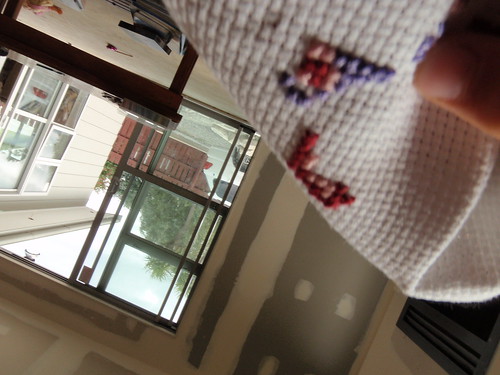
Can you see the walls are now plastered? This is in the new lounge.
She had to take lots of photos of the finished product like I always do of my knitting. There were some interesting photos - on the car bonnet, on the dog, in the dolls buggy with the doll, etc.
This is MiddleMiss doing her cross-stitch - it's a butterfly, if you can't tell. Artsy photo taken by LittleMiss.
I had hoped to get some sewing of my own done, but ended up spending it on the couch with the girls so I could give them the right amount of attention as needed. I did manage to get some knitting done, in between helping.
By the time J got home it felt like I'd done nothing all day, but it was guilt-free as I'd spent quality time passing on crafty love to my girls!
.png)








.jpg)

